Simple Wedding Bouquet
Soft and romantic, wedding bouquets can really express the style of the person carrying it -- but they don't have to be difficult! There are simple tips and techniques that make it easier to construct and very secure. In this Flower School How-To Video Leanne takes you step-by-step through the creation of this hand-tied wedding bouquet featuring a soft spring mix of roses, lisianthus, tulips, hellebores, pink pieris, and fragrant trailing jasmine. Enjoy!
Video Transcription
Soft and casual, also romantic and flowing. This bouquet was inspired by teacher Jeri Barr from Bella Bloom Florals. Let me show you how it's done.
Most important, prepare everything ahead of time. Lay it all out. I know it's out of water, but this is what you need to do to make it perfect. Make sure that all the foliage is removed, so you have just the beautiful blooms. When it comes to individual blooms, take the time to reflex them, get them ready, just kind of flipping them back. It's most visible in a tulip. When it's reflexed, it gives you so much more face, so just taking the time, slowly manipulating. You don't want to crack them. Best is at room temperature, so that they aren't cold. Then as you're working with it, there may be a few petals that you actually want to pick out that don't reflex as nicely, and don't hesitate. Just remove those, and then reflex the others to get the beautiful bloom. Same thing with lisianthus. Some you want buds. Some you want to take the time to reflex, to get a little more color showing to make them fabulous. With the roses, remove the foliage. Take off all the side. Make sure there's no thorns, then flip it. Just roll it in your hands and get it to bloom out nice and full. Once you have that all done, you're ready to design. The base, a bit of eucalyptus. You've seen people use floral netting, the eggs, so many different things. Sometimes it's better to just take a natural product, knot it all together, and create a base that begins your bouquet.
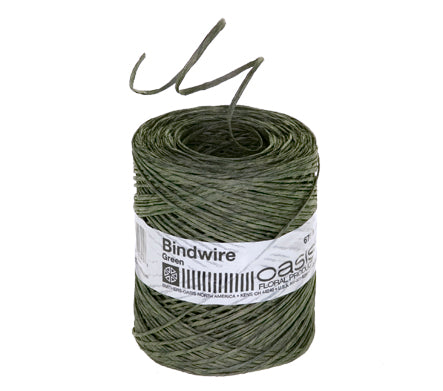
With the eucalyptus, knotted into place, then add base materials. Think in layers. You want your delicate things in the top, heavy things at the bottom. Pieris, absolutely perfect to tuck in at the beginning, pulling it together in my hand, repeating. Then think about extension, spreading out. Jasmine vine, just feeding it in. It can go below the eucalyptus bundle or through, it doesn't matter. It sorta depends on where you want it to end up. You can actually come down through the top, letting it trail outward, giving it that soft, romantic look. Pulling everything together, some towards the back and then out side to side. When you've got it secured, you can take just a bit of bind wire and lash it together to make it easier as you move on.
When you're ready to add flowers, think of the bulkier, linear, heavier things first, so taking the stalk. It's got a nice line. Feeding it through, adding in, finding the perfect spot, and then carrying your eye off to the opposite side. Then coming back with the full-size roses. This is called mocha. It's a little bit bigger and heavier, so tucking it down low, but if you take a second one and let it come out slightly above, giving you a little bit of depth to the design, feeding it through, finding the perfect hole, and shadowing it, one below the other. So, more advanced school techniques, shadowing, grouping, creating line, and then thinking in layers.
As you expand and enhance, not everything has to go through the center. Sometimes you want to bring it in through the side to get a bit of extension coming out. Then come back. Add in additional materials, thinking about how you want it to come over. Maybe a little bit taller. Tucking it in. See how it has great movement, that drape? I want to tuck that in so it gives me a little bit of a stand-up, but it's above the other portion. Then bringing in the lisianthus, finding the perfect hole, feeding it in. The hellebore, letting it come out a little bit longer so it comes out in different levels, different layers, so that you have more impact in the design.
Once you have that set, take a look. It's nice to look in a mirror so you can see what it looks like face-on. Then go back and add in. Maybe you want some of the majolika roses. That white, kind of alabaster, adds impact. Bring it around to the back side, feeding it in. Another one of the hellebore coming out to the front, maybe another tulip, and think about leaving space between each bloom so that each face shows nicely and starts building into those layers. You can come back, add another, add another, until you're happy with the placement.
As you have the base set, go back and tie it off one more time, just a bit of bind wire securing it, and I don't do super tight. Just enough to make sure that it's not going to shift. Give it a twist, then come back with delicate items. I didn't have these set out earlier. These are the dancers that are going to go across the top. You have your bouquet, you could stop, but it's nice to go back and just add a little bit more. Feeding it in, letting it be a little bit longer. Giving movement over the top of the design, maybe some butterfly ranunculus, tucking them in and letting them extend. Then repeat with a few more blossoms.
The recipe, super casual. You can always go back and add a little more Jasmine Vine to get even more draping. Adjust to get it to just what you want. If you remember, we started with Eucalyptus tied into a ball that helped to separate everything, give us a base to begin with. Then we filled in with the Pieris and the Jasmine Vine. Flowers, had two stems of the white Majolika Roses. Six stems of the Mocha Rose, standard size. Stock, five, spreading out to create a line within the design. Eucalyptus was at the base, then I came back and added Lisianthus, three stems tucked in throughout three Tulips that I reflexed. The Orlaya, ended up using five stems of orlaya. It spread out, giving me a little bit of an upper level. Hellebore, I ended up with four stems tucked in, and then the lovely Butterfly Ranunculus, one, two, three stems tucked in.
Soft, flowing, a little smaller, the romantic wedding bouquet is on trend, yet there are so many different ones. You'll find more inspiration on our website, flowerschool.com. If you have questions, you can reach us through there. Now it's your turn. Gather a variety of your favorite flowers and design casually, soft and flowing. Be sure to take a picture, post it on social media, and #FloralDesignInstitute. That way we all can see what you do as you do something you love.


