Bespoke Styled Holiday Wreath
In this video clip Leanne creates a spectacular holiday wreath in the bespoke garden style. The design is loose, wild and filled with woodland treasures. Mixed evergreens, cryptomeria, magnolia leaves and sculptural branches create a dramatic base. The addition of elegant rust colored cymbidium orchid blossoms are the perfect enhancement for this dramatic design. Enjoy!
Welcome to the Flower School.com video library. I'm Leanne Kesler, director of the Floral Design Institute and today, I'm here to share with you a creative approach to the traditional Christmas wreath, so let's get started.
When you choose a pre-made wreath, it's important to look at the back. You would prefer a metal frame. They come in metal and plastic, but the metal ones just seem to be better, so look at the back, check for that. Then you want to fluff it out, because when they make these wreaths, they stack them 10 high, band them, and they put them in big, big crates and stack them again, so the further down, the more they get smashed. You want to go in and massage it, loosen it up, fluff it, so that it's fuller, a little more luxurious, and it just takes a little bit of time, but it makes a dramatic difference in how the wreath will look.
Adding unique materials can personalize your wreath. For this, I'm going to use some magnolia, shiny green on one side, beautiful butterscotch suede on the other side, and then an evergreen foliage called cryptomeria. It's green in the summer and this beautiful mahogany in the winter. To do this, I use pan melt glue. Now, I've got a tiny pan, but any frying pan will work. The glue comes in pillows, little tiny hard candy pillows, and you melt it down, and then you can glue the materials directly in. So using the cryptomeria, just cutting it down, and then the magnolia, you can use as individual leaves, or you can go back and use a portion of the stem, whatever works. Then when you go to insert it, just dip it into the glue, squiggle it so you don't have too many cobwebs, then lift and insert following the same pattern that the foliages have already set, so again, it's just a dip, lift and insert. You can see you add texture and color, but of course, adding cones is always a great touch. You can go back, just dip and tuck them right in. No need to wire. Isn't this a great labor saver? What would I do without pan melt glue?
As I was working, you may have wondered, why not just use a glue gun? Why do you have to use pan melt? You can use a glue gun. The pan melt is just more efficient, because you can use both hands at the same time, you don't have to be squeezing the gun. This is just a little more efficient, and it melts at a lower temperature, so you don't burn yourself as badly as you do with a hot melt glue gun, and yet it still bonds totally fine. As you can see, it's gorgeous. Now let's go one more step and add some branches, add some movement, some dynamic line.
I've got gorgeous magnolia, isn't that grand? It has just such great skeletal structure. Pulling out a stem, and maybe another, setting the other aside, don't know that I'll need that right now. And then cutting it down, don't want quite as much, so getting rid of the end, maybe breaking this one apart right about there and there. Ooh, look at that little piece, definitely want to save that. It's too beautiful to lose. Love the little fuzzy catkins on them. Then again, determining where you want to place it, dipping it into the glue, making sure you get a nice amount on there, and then lifting and tucking, forcing it right down into the weave of the wreath itself. Another piece, and letting it be a little bit gangly and sticking out, giving it movement, and then go back and add a little more, until you're satisfied with the placement.
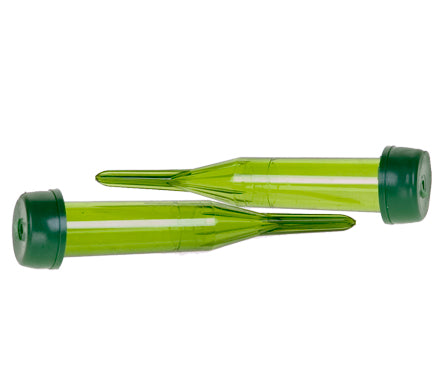
Completed like this, it'll last for the full month, maybe more. It's such a wonderful wreath with long-lasting materials that you don't have to worry about, just put it on the door and enjoy, but if you're entertaining, want to make it a little extra special, adding fresh flowers gives it just that final touch to make it fabulous. To do that, the cymbidium orchid is perfect, because it too is long lasting, so you can get a week or two out of it. Place it in a water tube, and using the smaller tubes, give it a cut so that it's not quite so tight, and then just sliding it right down in, making sure it gets down into the water. Maybe another here. You can reflex the petals so that their faces show a little more, and then once again, just dip it into the pan melt and set it right into your wreath.
To ensure your wreath lasts as long as possible, when you're done, go back and spray everything with the Crowning Glory. Just saturate the flowers, the foliages, the branches, and it will lock the moisture in to extend the life of the wreath, so you can enjoy it throughout the season.
For more creative inspiration, check out the website, Flower School.com. The website contains hundreds of floral design how-to videos, floral design classes, online floral classes and DIY Flowers.
If you have questions you can reach us through there, or my telephone at 503-223-8089. It's easier to use my personal email, it's leanne@floraldesigninstitute.com, and I'd love to see what you create. Take a picture. Post it on social media, and tag #FloralDesignInstitute so we all can see. For now, it's your turn. Have fun and do something you love.


