Fantastic Floral Fascinator
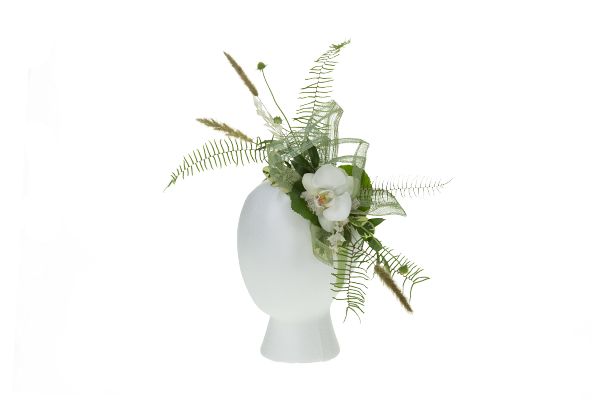
Want to up your accessories game for the next social event you attend with a “fascinating” take on flowers-to-wear? Then you’re in the right place! In this step-by-step tutorial, FDI Instructor Michelle Headrick AIFD PFCI mixes an assortment of fresh, dried, and preserved materials — and one fabulous white Phalaenopsis orchid bloom — to create a foliage and flower fascinator. (Why should the British have all the fun?!)
STEP ONE:
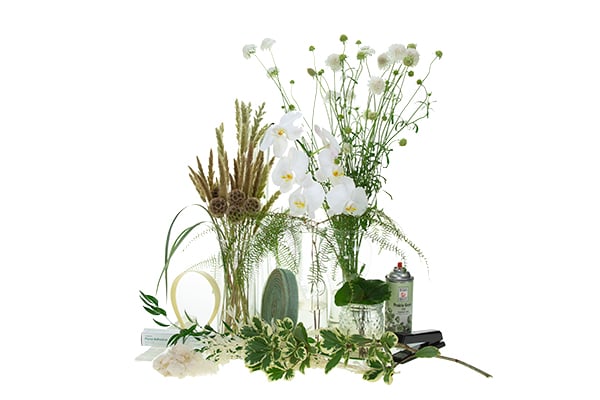
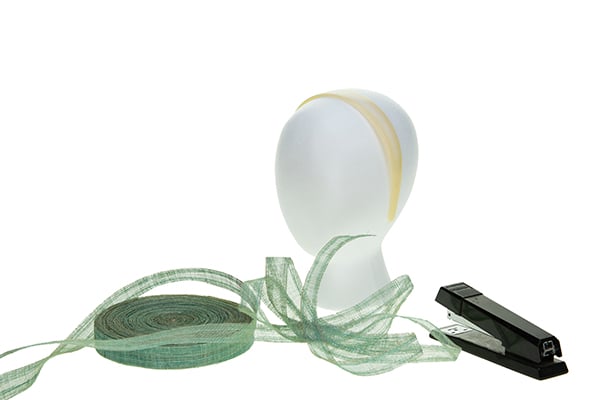
One Phalaenopsis orchid bloom, fresh scabiosa (pods are optional), umbrella fern, dried bunny tail grasses, Galax leaves, Italian ruscus, variegated pittosporum, bleached and preserved reindeer moss, bleached and preserved Italian ruscus, variegated lily grass (optional), 1” wide Sinamay ribbon, Design Master Colortool Spray in #752 “Prairie Grass”, OASIS Floral Adhesive, UGLU Adhesive Dashes, Stapler, Headband
STEP TWO:
For the base structure select a headband about 1” wide, available from a beauty supply store or your nearby pharmacy hair-accessories section. To create the form that will support the floral materials, use 1” wide Sinamay ribbon, which can be sourced from your local wholesaler or online retailers.
Spool off a length of the Sinamay ribbon — Teacher Michelle uses about 40” — and loop it back and forth in a figure-8 pattern, making 3 to 5 loops (odd numbers look better). Staple the layers of Sinamay ribbon together several times at the center binding point.
STEP THREE:
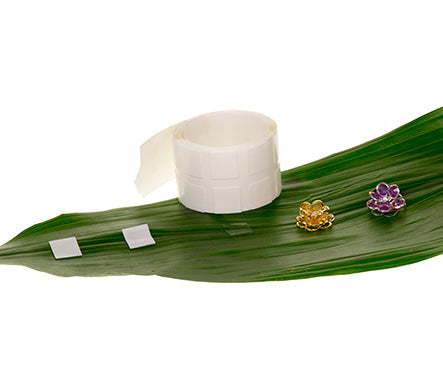
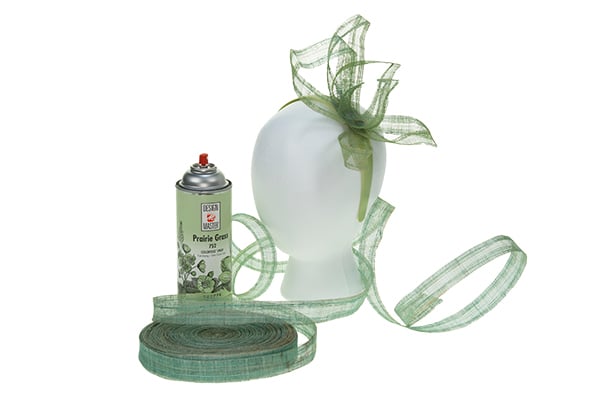
Determine on which side of the head the fascinator will be worn, then affix the ribbon loops to the headband using a UGLU Adhesive Dash. Next, pinch and twist the ribbon loops to make them resemble open-form leaves; the Sinamay will hold the shape.
In this design the ribbon color was a bit too blue-green (and the headband a dull ivory) so Teacher Michelle airbrushed the entire structure — ribbon and headband — with two coats of Design Master Colortool in “Prairie Grass”. This fresh green color helps unify the materials and creates a coordinated base more complimentary to the flowers and foliage selected.
*Though you may be tempted to use hot glue to affix the ribbon to the headband, resist that urge! Hot glue can lose its hold when the finished piece is placed in the cooler, causing your design to come apart. Stick with a UGLU Dash or OASIS Floral Adhesive for secure, professional mechanics.
STEP FOUR:
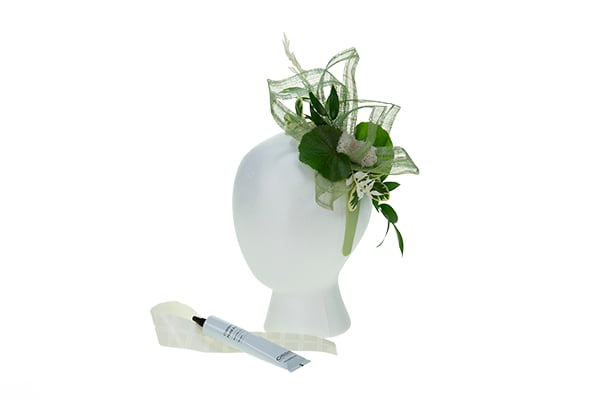
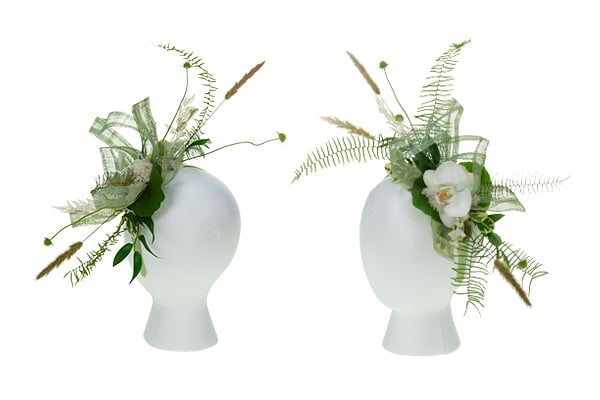
Add various foliages, both fresh and preserved, to create an interesting mix of colors and textures. Attach galax leaves first using UGLU Adhesive Dashes, then add sprigs of Italian ruscus as well as bleached and preserved Italian ruscus to create a diagonal line through the focal area. Lastly, use OASIS Floral Adhesive to tuck in and secure several small clusters of variegated pittosporum and bleached and preserved reindeer moss to the headband.
STEP FIVE:
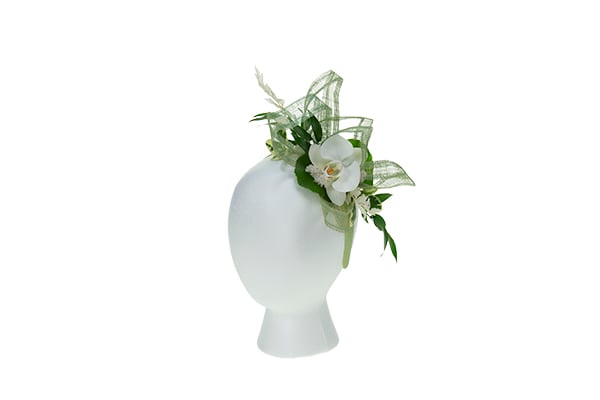
Once the floral adhesive has had a few minutes to cure, glue a single perfect Phalaenopsis orchid to the center adding a bit of reindeer moss tucked underneath its “chin” to cushion the bloom and provide textural contrast between the orchid and galax leaf.
STEP SIX:
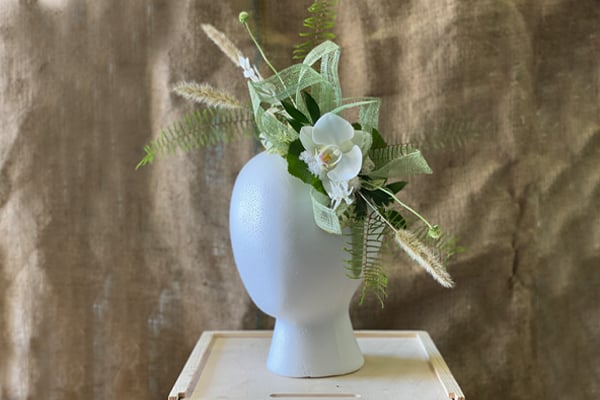
To enhance rhythm, add movement, and reinforce the diagonal line created with the ruscus, add dried bunny tail grasses, fresh scabiosa buds and a partial stem of umbrella fern with OASIS Floral Adhesive. Attach additional bits of reindeer moss to conceal any exposed mechanics.
Though initially considered, the scabiosa pods and variegated lily grass were not used as part of this design.
STEP SEVEN:
Lastly, be sure to coat your finished design with an anti-transpirant such as Crowning Glory to lock in moisture and ensure your floral creation lasts as long as possible. Then you’re ready to make a grand entrance in a floral fascinator fit for royalty!
Thank you to FDI Instructor Michelle Headrick AIFD PFCI for this elegant floral accessory. If you would like to learn more, join us in the Classroom or Online and study the theories and techniques of design with the Floral Design Institute Teachers.


