Succulent Topped Pumpkin
Not all pumpkins need to be cut and carved into Jack-O-Lanterns, and not all fresh flowers in a flowers shop sell. In this Flower School How-To Video Leanne takes you through step-by-step as she creates a stunning Fall design without the mess and "horror" of cutting & carving using a blue-gray Jarrahdale pumpkin and an assortment of dried & preserved floral materials. Enjoy!
Video Transcription
Pumpkin arrangements are fabulous. The carving, not so much. In today's design, succulent topped pumpkin. I'll show you how to do it without the horror of cutting.
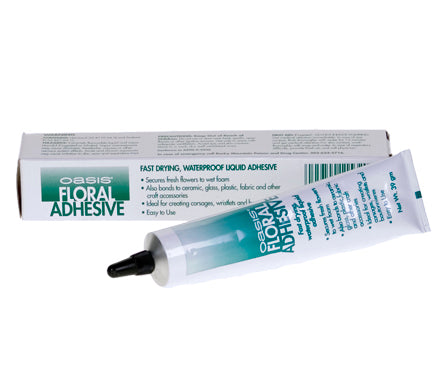
The Jarrahdale pumpkin is one of the most popular in the blue color palette. The mechanics we'll be using, the Oasis floral adhesive. Not going to carve it open because I want it to last and last. As florists, we always have so much fresh product, and sometimes it doesn't sell. But hydrangeas dry wonderfully, straw flowers dry wonderful. So many things you can repurpose, turn into a profit center. Of course, adding some fabulous succulents to make it extra special.
Start by basing with your larger materials. To make sure that they adhere nicely, I go back first to the pumpkin and put just a bit of glue all over where I think I'm going to be putting materials, tucking it in, making sure I don't get it on the stem because that's so beautiful, I want to leave that exposed. But tucking in a bit of glue. Then starting with the heaviest materials. Now, cockscomb celosia, it's going to dry and keep this beautiful color. Even though this is a fresh item, I'm going to go ahead and pull it apart, getting down to smaller bits. Then add glue to this. Let it begin to set, it will bond better once it has begun to dry. And the same thing with bits of hydrangea. This has already dried. I'm just plucking it off, adding a little glue on the tips. Letting it sit a moment. And going back. Since there's glue on the pumpkin, glue on the materials, you're doing glue to glue, it will hold so much better. Just tap it into place, put a little pressure, tucking it underneath the handle, coming back with the hydrangea. Then once you have a nice base, you can go back. Taking your succulents and actually cut them from the plant, remove any of the damaged leaves, glue on the base. Let it begin to dry. Then again, tucking it in so that you get glue to glue to ensure really strong stability.
Once the base is established, you can go back and detail with the tinier items. Now this is fresh seeded eucalyptus, but it'll dry and keep that blue gray color coordinating with the pumpkin. Just putting a bit of glue on the stem. And it's so lightweight. You can just go ahead and place it in, feeding it underneath the blooms, letting it extend a bit. Artemisia, also fresh. Nice little fragrance to it. Tucking in for extra texture. Reindeer moss, again, a nice textural piece. It's dried. Then I had some leftover straw flowers from an arrangement. They're not totally dry yet. You can see they're just kind of flopping around. But they will dry right in here. So just cutting them down. A bit of glue. Then adding them to enhance the color and texture.
The recipe, one Jarrahdale pumpkin. Then I started with the larger items. I had one bit of hydrangea that I just broke apart. Two of the cockscomb celosia. Then I enhanced it with the three succulents. Then for bits, seeded eucalyptus, artemisia, straw flower, and reindeer moss. You mix and match just whatever quantities you have to create the beauty you desire.
I know many of you are cringing because I cut up the succulent. But the magic of this design, when the season's over, you're tired of it, you can pull it apart, compost it. But save the succulents, give it a fresh cut, and you can root them and enjoy them again.
You'll find more creative inspiration just like that on the website, Flower School .com. If you have questions, you can reach us through there. Now it's your turn. Find a pumpkin, gather your treasures, and create a design. Be sure to post it on social media at hashtag Floral Design Institute. That way we all can see what you do as you do something that you love.


